Step 2: Enable Routing
Preview

Coding
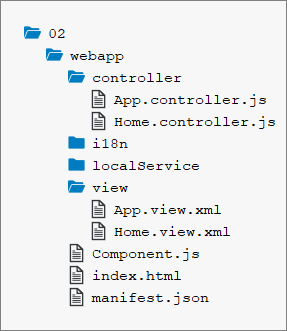
You can view and download all files in the Samples in the Demo Kit at Routing and Navigation - Step 2.
webapp/manifest.json
{
   "_version": "1.12.0",
   "sap.app": {
      ...
   },
   "sap.ui": {
      ...
   },
   "sap.ui5": {

      "rootView": {
          "viewName": "sap.ui.demo.nav.view.App",
          "type": "XML",
          "async": true,
          "id": "app"
      },
      "dependencies": {
         ...
      },
      "models": {
         ...
      },
      "routing": {
         "config": {
            "routerClass": "sap.m.routing.Router",
            "type": "View",
            "viewType": "XML",
            "path": "sap.ui.demo.nav.view",
            "controlId": "app",
            "controlAggregation": "pages",
            "transition": "slide",
            "async": true
         },
         "routes": [{
            "pattern": "",
            "name": "appHome",
            "target": "home"
         }],
         "targets": {
            "home": {
               "id": "home",
               "name": "Home",
               "level" : 1
            }
         }
      }
   }
}
Single-page applications based on SAPUI5 can use a
so-called "router" to dispatch hash-based URLs to one or more views of the app.
Therefore, the router needs to know how to address and show the views. In SAPUI5, we can simply
add a routing section to our existing sap.ui5
section in the descriptor file to configure the router. There are three properties
that can be used to configure the routing of your application:
-
configThis section contains the global router configuration and default values that apply for all routes and targets. The property
routerClassis special as it determines the router implementation. The default value issap.ui.core.routing.Router. Here, we set therouterClasstosap.m.routing.Router, because we implement an app based onsap.m. All other properties inconfigare given to the router instance. For example, we define where our views are located in the app. To load and display views automatically, we also specify thecontrolIdof the control that is used to display the pages and the aggregation (controlAggregation) that will be filled when a new page is displayed. We will create only XMLviews in this tutorial, so we can set theviewTypeproperty toXML. All our views will be available in theviewfolder of the namespacesap.ui.demo.nav, so we can set thepathtosap.ui.demo.nav.view. Thetransitionallows us to set a default value for how the transition should happen; you can choose betweenslide(default),flip,fade, andshow. All parameters of the config section can be overruled in the individual route and target definitions if needed.The possible values for
routerClassaresap.ui.core.routing.Router,sap.m.routing.Router, or any other subclasses ofsap.ui.core.routing.Router. Compared tosap.ui.core.routing.Routerthesap.m.routing.Routeris optimized for mobile apps and adds the propertieslevel,transitionandtransitionParameterswhich can be specified for each route or target created by thesap.m.routing.Router. ThetransitionParameterscan also be used for custom transitions. Please check the API Reference for more information. -
routesEach route defines a name, a pattern, and one or more targets to navigate to when the route has been hit. The pattern is basically the hash part of the URL that matches the route. The sequence of the routes is important because only the first matched route is used by the router. In our case, we have an empty pattern to match the empty hash. The
nameproperty allows you to choose a unique route name that helps you to navigate a specific route or to determine the matched route in one of the matched handlers (we'll explain that in a later step). The target property references one or more targets from the section below that will be displayed when the route has been matched. -
targetsA target defines either a view that is displayed or a component that can be loaded and placed through its routing. In order to distinguish between these two target types, it is required to define the
typeproperty and set it either toVieworComponent. In this sample, we will focus on view targets and define thetypeproperty asView. A target is associated with one or more routes, or it can be displayed manually from within the app. Whenever a target is displayed, the corresponding view is loaded and added to the aggregation configured with thecontrolAggregationoption of the control. This option is configured usingcontrolId. Each target has a unique key (home). Thenamedefines which view shall be loaded. In our little example, the absolute view path to be loaded for ourhometarget is determined by the default"path": "sap.ui.demo.nav.view"and"name": "Home". This leads to"sap.ui.demo.nav.view.Home". Thelevelproperty is especially relevant forflipandslidetransitions. It helps the router to determine the direction of the transition from one page to another. (This will also be explained later.) A target can be assigned to a route, but it's not necessary. Targets can be displayed directly in the app without hitting a route.This basic routing configuration was easy enough. However, you can't see it in action until you have initialized the router.
As of SAPUI5
version 1.30, we recommend that you define the routing in the
manifest.json descriptor file using routes and targets.
In older versions of SAPUI5, the
routing configuration had to be done directly in the metadata section of the
component, and with different syntax.
webapp/Component.js
sap.ui.define([
    "sap/ui/core/UIComponent"
], function (UIComponent) {
    "use strict";

    return UIComponent.extend("sap.ui.demo.nav.Component", {

        metadata: {
            manifest: "json"
        },

        init: function () {
            // call the init function of the parent
            UIComponent.prototype.init.apply(this, arguments);

            // create the views based on the url/hash
            this.getRouter().initialize();
        }
    });
});
We override the init function and call the parent's
init function first. We get a reference to the router and call
initialize() on it. The router is instantiated automatically
with the configuration loaded in the descriptor. The routing events and our
configuration in the descriptor are now automatically enabled in the app. Running
the app at this point would lead to an error, because the home view is not
implemented yet.
webapp/view/App.view.xml
<mvc:View
	controllerName="sap.ui.demo.nav.controller.App"
	xmlns="sap.m"
	xmlns:mvc="sap.ui.core.mvc"
	displayBlock="true">
	<Shell>
		<App id="app"/>
	</Shell>
</mvc:View>
In the App view, we remove the content of App
control. The pages will be added dynamically the way we have configured it in the
descriptor. The view configured with the property rootView is
automatically instantiated when the app is called initially.
webapp/view/Home.view.xml (New)
<mvc:View
   controllerName="sap.ui.demo.nav.controller.Home"
   xmlns="sap.m"
   xmlns:mvc="sap.ui.core.mvc">
   <Page title="{i18n>homePageTitle}" class="sapUiResponsiveContentPadding">
      <content>
         <Button text="{i18n>iWantToNavigate}" class="sapUiTinyMarginEnd"/>
      </content>
   </Page>
</mvc:View>
Create a file Home.view.xml in the webapp/view
folder. The home view only contains a page control that displays a button. For
illustration, we bind the title of the page to the
i18n>homePageTitle, you can use data binding just the way
you are used to it.
webapp/controller/Home.controller.js (New)
sap.ui.define([
   "sap/ui/core/mvc/Controller"
], function (Controller) {
   "use strict";

   return Controller.extend("sap.ui.demo.nav.controller.Home", {

   });

});
Create a file Home.controller.js in the
webapp/controller folder. The controller for the home view does
not contain any custom logic in this step, but we will add some features to it soon.
Finally, run the app by calling the webapp/index.html file. This
will be the entry point for our app in all the next steps. As you can see, the app
is initially displaying the home view that we configured as the default pattern in
the routing configuration. We have now successfully enabled routing in the app.
We think of routing as a set of features that dispatch hash-based URLs to an app's views and manage the views' states.
Based on the routing configuration, you define the navigation between pages and pass parameters to the target views.
Conventions
-
Configure the router in the
manifest.jsondescriptor file -
Initialize the router exactly once
-
Initialize the router in the component
Parent topic: Navigation and Routing Tutorial
Previous: Step 1: Set Up the Initial App