Step 26: Mock Server Configuration
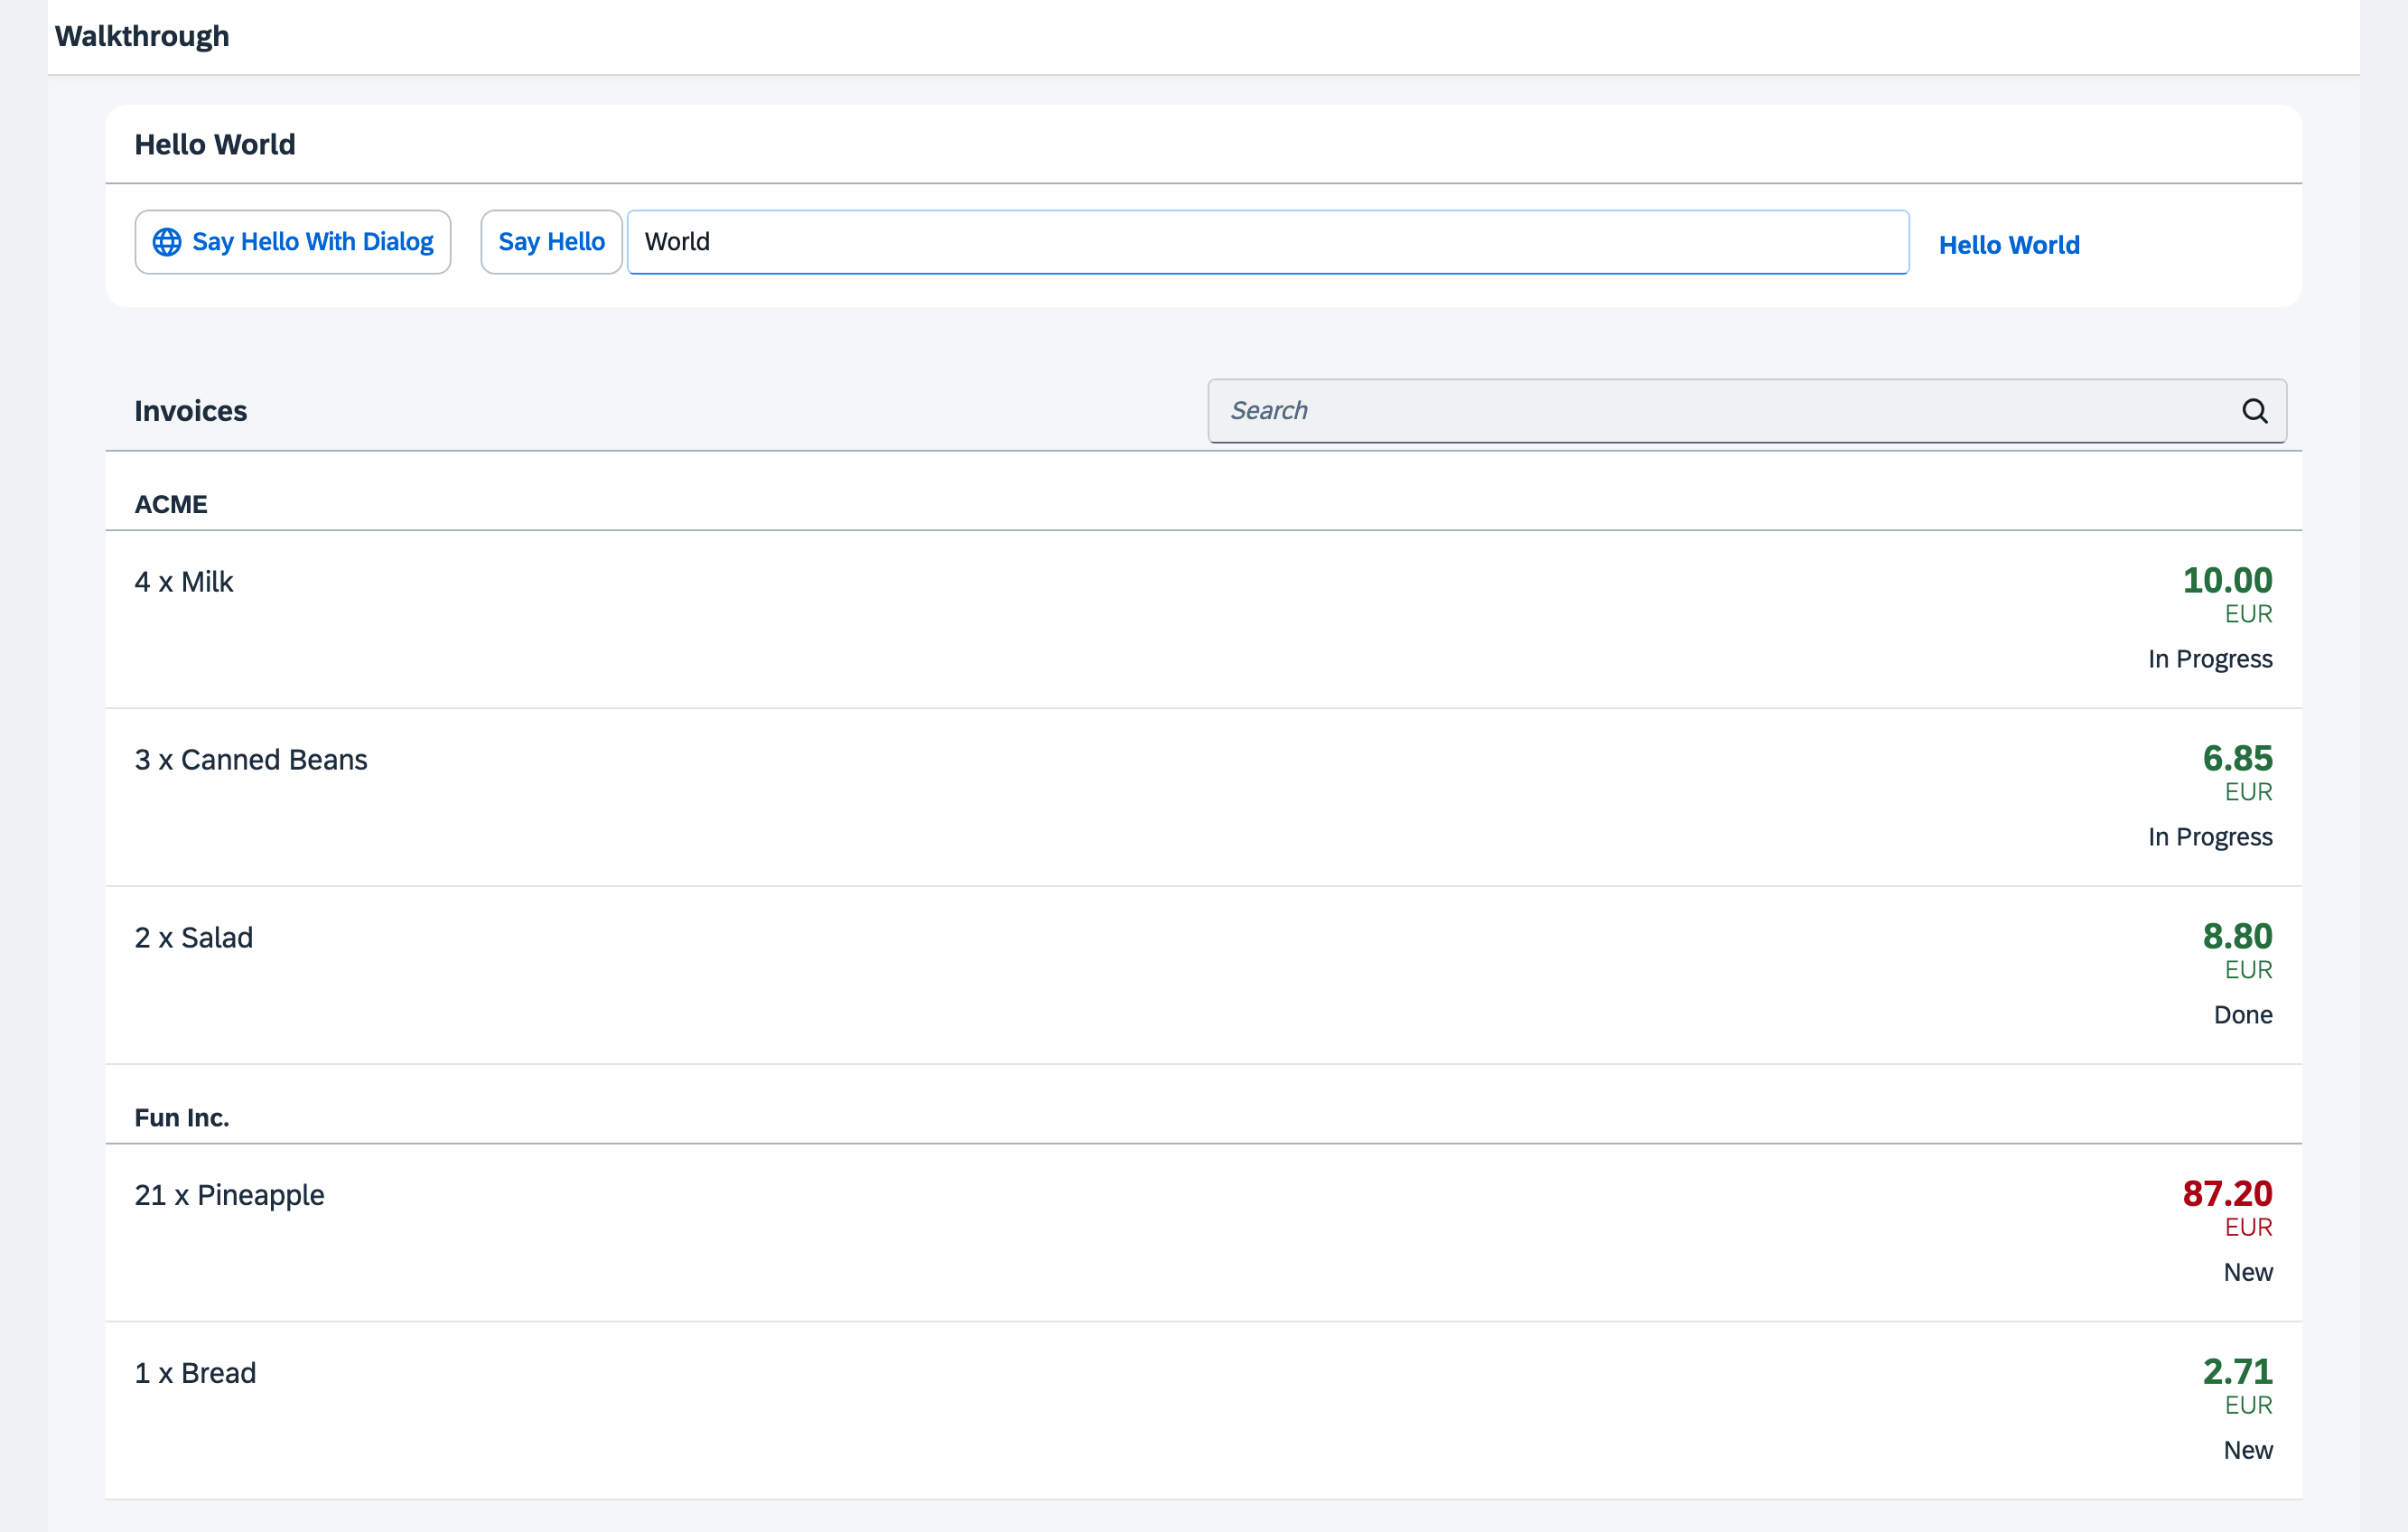
This system is the so-called back-end system that we will now simulate with an SAPUI5 feature called mock server. It serves local files, but it simulates a back-end system more realistically than just loading the local data. We will also change the model instantiation part so that the model is configured in the descriptor and instantiated automatically by SAPUI5. This way, we do not need to take care of the model instantiation in the code.
Preview

Coding
You can view and download all files at Walkthrough - Step 26.

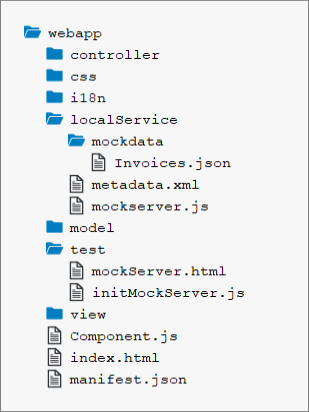
The folder structure of our app project is clearly separating test and productive
files after this step. The new test folder now contains a new HTML
page mockServer.html which will launch our application in test
mode without calling the real service.
The new localService folder contains a
metadata.xml service description file for OData, the
mockserver.js file that simulates a real service with local
data, and the mockdata subfolder that contains the local test
data (Invoices.json).
webapp/test/mockServer.html (New)
<!DOCTYPE html>
<html>
<head>
	<meta charset="utf-8">
	<title>SAPUI5 UI5 Walkthrough - Mockserver Test Page</title>
	<script
		id="sap-ui-bootstrap"
		src="../resources/sap-ui-core.js"
		data-sap-ui-theme="sap_horizon"
		data-sap-ui-compat-version="edge"
		data-sap-ui-async="true"
		data-sap-ui-on-init="module:ui5/walkthrough/test/initMockServer"
		data-sap-ui-resource-roots='{
			"ui5.walkthrough": "../"
		}'>
	</script>
</head>
<body class="sapUiBody" id="content">
	<div data-sap-ui-component data-name="ui5.walkthrough" data-id="container" data-settings='{"id" : "walkthrough"}'></div>

</body>
</html>
We copy the index.html to a separate file in the
webapp/test folder and name it
mockServer.html. We will now use this file to run our app in test
mode with mock data loaded from a JSON file. Test pages should not be placed in the
application root folder but in a subfolder called test to clearly
separate productive and test coding.
From this point on, you have two different entry pages: One for the real "connected" app (index.html) and one for local testing
(mockServer.html). You can freely decide if you want to do the next steps on the real service data or on the
local data within the app.
We modify the mockServer.html file and change the page title to distinguish it from the productive start page. In
the bootstrap, the data-sap-ui-resource-roots property is also changed. The namespace now points to the folder above
("../"), because the mockServer.html file is now in a subfolder of the
webapp folder. Instead of loading the app component directly, we now call a script
initMockServer.js.
webapp/test/initMockServer.js (New)
sap.ui.define([
	"../localService/mockserver"
], (mockserver) => {
	"use strict";

	// initialize the mock server
	mockserver.init();

	// initialize the embedded component on the HTML page
	sap.ui.require(["sap/ui/core/ComponentSupport"]);
});
The first dependency is a file called mockserver.js that will be
located in the localService folder later.
The mockserver depencency that we are about to implement is our
local test server. Its init method is immediately called before we
load the component. This way we can catch all requests that would go to the "real"
service and process them locally by our test server when launching the app with the
mockServer.html file. The component itself does not "know" that
it will now run in test mode.
webapp/localService/mockdata/Invoices.json (New)
[
  {
	"ProductName": "Pineapple",
	"Quantity": 21,
	"ExtendedPrice": 87.2,
	"ShipperName": "Fun Inc.",
	"ShippedDate": "2015-04-01T00:00:00",
	"Status": "A"
  },
  {
	"ProductName": "Milk",
	"Quantity": 4,
	"ExtendedPrice": 10,
	"ShipperName": "ACME",
	"ShippedDate": "2015-02-18T00:00:00",
	"Status": "B"
  },
  {
	"ProductName": "Canned Beans",
	"Quantity": 3,
	"ExtendedPrice": 6.85,
	"ShipperName": "ACME",
	"ShippedDate": "2015-03-02T00:00:00",
	"Status": "B"
  },
  {
	"ProductName": "Salad",
	"Quantity": 2,
	"ExtendedPrice": 8.8,
	"ShipperName": "ACME",
	"ShippedDate": "2015-04-12T00:00:00",
	"Status": "C"
  },
  {
	"ProductName": "Bread",
	"Quantity": 1,
	"ExtendedPrice": 2.71,
	"ShipperName": "Fun Inc.",
	"ShippedDate": "2015-01-27T00:00:00",
	"Status": "A"
  }
]
The Invoices.json file is similar to our previous file in the
webapp folder. Just copy the content and remove the outer
object structure with the key invoices so that the file consists of
one flat array of invoice items. This file will automatically be read by our server
later in this step.
Remove the old Invoices.json file from the webapp
folder, it is no longer used.
webapp/localService/metadata.xml (New)
<edmx:Edmx Version="1.0" xmlns:edmx="http://schemas.microsoft.com/ado/2007/06/edmx">
	<edmx:DataServices m:DataServiceVersion="1.0" m:MaxDataServiceVersion="3.0"
			xmlns:m="http://schemas.microsoft.com/ado/2007/08/dataservices/metadata">
		<Schema Namespace="NorthwindModel" xmlns="http://schemas.microsoft.com/ado/2008/09/edm">
			<EntityType Name="Invoice">
				<Key>
					<PropertyRef Name="ProductName"/>
					<PropertyRef Name="Quantity"/>
					<PropertyRef Name="ShipperName"/>
				</Key>
				<Property Name="ShipperName" Type="Edm.String" Nullable="false" MaxLength="40" FixedLength="false"
							Unicode="true"/>
				<Property Name="ProductName" Type="Edm.String" Nullable="false" MaxLength="40" FixedLength="false"
							Unicode="true"/>
				<Property Name="Quantity" Type="Edm.Int16" Nullable="false"/>
				<Property Name="ExtendedPrice" Type="Edm.Decimal" Precision="19" Scale="4"/>
				<Property Name="Status" Type="Edm.String" Nullable="false" MaxLength="1" FixedLength="false"
							Unicode="true"/>
			</EntityType>
		</Schema>
		<Schema Namespace="ODataWebV2.Northwind.Model" xmlns="http://schemas.microsoft.com/ado/2008/09/edm">
			<EntityContainer Name="NorthwindEntities" m:IsDefaultEntityContainer="true" p6:LazyLoadingEnabled="true"
					xmlns:p6="http://schemas.microsoft.com/ado/2009/02/edm/annotation">
				<EntitySet Name="Invoices" EntityType="NorthwindModel.Invoice"/>
			</EntityContainer>
		</Schema>
	</edmx:DataServices>
</edmx:Edmx>
The metadata file contains information about the service interface and does not need
to be written manually. It can be accessed directly from the "real" service by
calling the service URL and adding $metadata at the end (e.g. in
our case
http://services.odata.org/V2/Northwind/Northwind.svc/$metadata).
The mock server will read this file to simulate the real OData service, and will
return the results from our local source files in the proper format so that it can
be consumed by the app (either in XML or in JSON format).
For simplicity, we have removed all content from the original Northwind OData
metadata document that we do not need in our scenario. We have also added the
status field to the metadata since it is not available in the
real Northwind service.
webapp/localService/mockserver.js (New)
sap.ui.define([
	"sap/ui/core/util/MockServer"
], (MockServer) => {
	"use strict";

	return {
		init() {
			// create
			const oMockServer = new MockServer({
				rootUri: sap.ui.require.toUrl("ui5/walkthrough") + "/V2/Northwind/Northwind.svc/"
			});

			const oUrlParams = new URLSearchParams(window.location.search);

			// configure mock server with a delay
			MockServer.config({
				autoRespond: true,
				autoRespondAfter: oUrlParams.get("serverDelay") || 500
			});

			// simulate
			const sPath = sap.ui.require.toUrl("ui5/walkthrough/localService");
			oMockServer.simulate(sPath + "/metadata.xml", sPath + "/mockdata");

			// start
			oMockServer.start();
		}
	};
});
Now that we have added the OData service description file
metadata.xml file, we can write the code to initialize the mock
server which will then simulate any OData request to the real Northwind server.
We load the standard SAPUI5
MockServer module as a dependency and create a helper object that
defines an init method to start the server. This method is called
before the component initialization in the mockServer.html file
above. The init method creates a MockServer
instance with the same URL as the real service calls.
The URL in the rootUri configuration parameter has to point to the same URL as defined in the uri property of
the data source in the manifest.json descriptor file. In the manifest.json, UI5 automatically
interprets a relative URL as being relative to the application namespace. In the JavaScript code, you can ensure this by using the
sap.ui.require.toUrl method. The sap/ui/core/util/MockServer then catches every request to the
real service and returns a response. Next, we set two global configuration settings that tell the server to respond automatically and
introduce a delay of 500 ms to imitate a typical server response time. Otherwise, we would have to call the respond method on the
MockServer manually to simulate the call.
To simulate a service, we can simply call the simulate method on the
MockServer instance with the path to our newly created
metadata.xml. This will read the test data from our local file
system and set up the URL patterns that will mimic the real service.
Finally, we call start on oMockServer. From this point, each request to the URL pattern rootUri will be
processed by the MockServer. If you switch from the index.html file to the
mockServer.html file in the browser, you can now see that the test data is displayed from the local sources
again, but with a short delay. The delay can be specified with the URI parameter serverDelay.
This approach is perfect for local testing, even without any network connection. This way your development does not depend on the availability of a remote server, i.e. to run your tests.
Try calling the app with the index.html file and the
mockServer.html file to see the difference. If the real service
connection cannot be made, for example when there is no network connection, you can
always fall back to the local test page.
package.json
For easier local development, we adjust the start script in the package.json to open
mockServer.html instead of index.html:
{
  "name": "ui5.walkthrough",
  "version": "1.0.0",
  "description": "The UI5 walkthrough application",
  "scripts": {
      "start": "ui5 serve -o test/mockServer.html"
  },
  "devDependencies": {
    "@ui5/cli": "^3",
    "ui5-middleware-simpleproxy": "^3"
  }
}
Conventions
-
The
webapp/testfolder contains non-productive code only. -
Mock data and the script to start the
MockServerare stored in thewebapp/localServicefolder. -
The script to start the
MockServeris calledmockserver.js.
Parent topic: Walkthrough Tutorial (JavaScript)
Previous: Step 25: Remote OData Service